
I baked some rolls for a dinner party I went to over the holidays.

I decided to do this because I forgot to pick up rolls at the supermarket like I had planned to and I had no intention of going back to the store in the midst of the holiday craziness. Anyways, I loved the whole process, the mixing, kneading, waiting...... then the way it made my house smell! Divine! I was hooked. Hence, the reason why I finally got around to baking my own bread, I love the process. It is so simple, so easy, plus kneading dough is fun, although a KitchenAid stand mixer would be awesome! (wink)
So anyways, lets get down to business. Since I'm a novice at this, I decided on a basic recipe I found on one of my favorite sites allrecipes.com. I also wanted a little more help so I went to thekitchn.com. I finally decided on using the recipe from the latter, mainly because I did not have bread flour and my OCD would not allow me to use it, I also did not want all of three loaves and I did not feel like doing (putting it into a computer program) all that math. :) So, enough chatter, here's what I did.
All you need is flour, wheat flour, honey, vegetable oil (I just used the olive oil I had), milk, salt, warm water and of course yeast! Then you just need a large bowl, a clean kitchen towel, your hands, a loaf pan and some patience. Easy!
Ingredients
1 cup warm water (Approx 110°F or 43°C)
2 tsp Active Dry Yeast
1 cup milk
1/4 cup honey
2 tbsp vegetable oil
2 3/4 cups All Purpose Flour
2 3/4 cups Whole Wheat Flour
1 tbsp salt
2 tbsp melted butter (optional)
Directions
1. Pour water into the bowl and add yeast. Let sit until dissolved (remember do not kill the yeast with hot water) Stir in the milk, honey and oil.
2. Add the All Purpose Flour a little at a time and stir until ingredients are combined. Add the Whole Wheat a little at a time until your dough looks shaggy. Let this stand for 20 minutes to allow for proper absorption.
3. Turn dough over onto a floured surface and knead for about 10 minutes. If the dough is sticky, add a little flour. It should be smooth and slightly sticky and should spring back when poked when you are done. Shape into a ball.
4. Clean the bowl and film with a little oil then place your kneaded dough in it. Turn the dough to coat all sides. Cover the bowl and let sit in a warm area for about 1-1 1/2 hours to allow the dough to rise. It should look visibly puffed, almost twice the size it was before.
5. Sprinkle some flour on the counter and turn out your dough on top of it. Divide the dough in half and shape into a loose ball. Let sit for 10 minutes. (Since I only made one loaf, I wrapped one of the balls and placed it into a Ziploc then the freezer until I'm ready for it. You could do this after you shape it as well)
6. Grease the loaf pan. Shape dough ball into a loaf. You do this by flattening the ball into a circle, wait, shape into a rectangle slightly larger than the pan, wait, then roll into shape of log with seam on the bottom, tuck in the ends and pinch closed and invert into pan. You could also go here, Shaping a Loaf of Bread. Make sure the surface is stretched nice and taut.
7. Let rise once again until it is about to dome over the edge, about 30-40 minutes. Heat oven to 425°F halfway through.
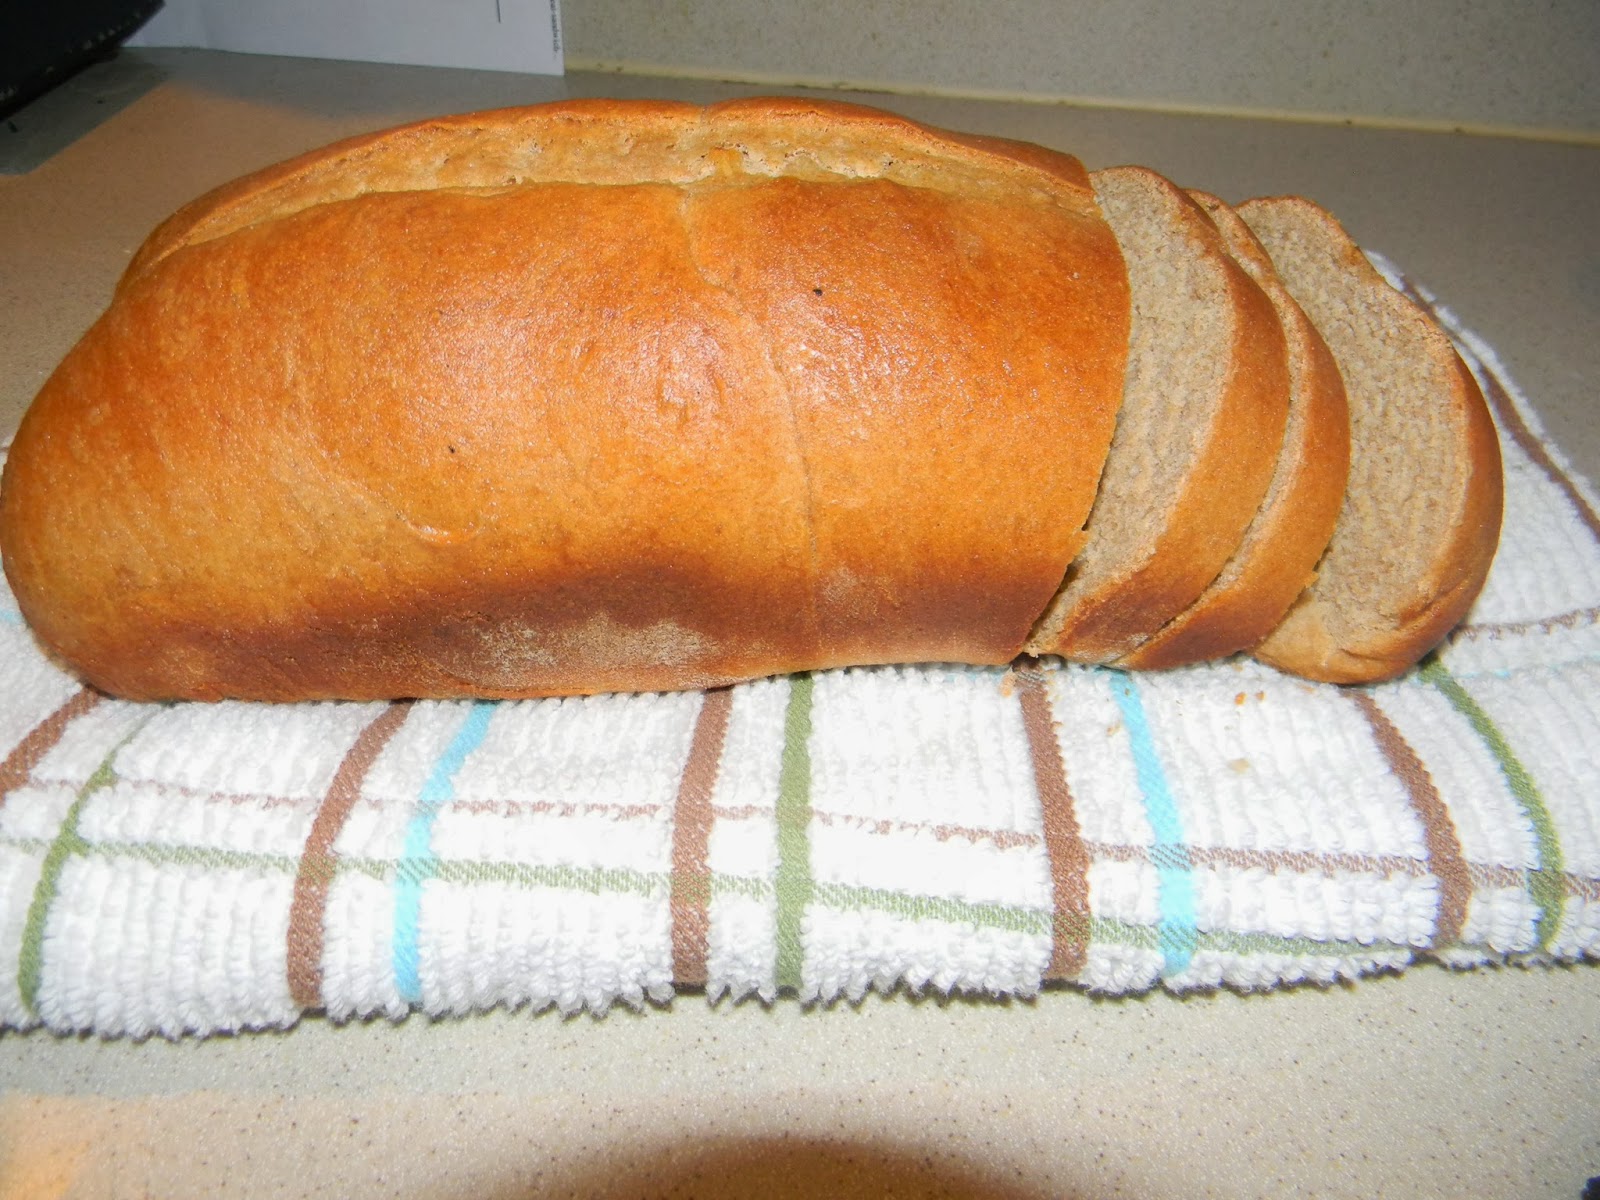
8. With a serrated knife, slash the top of the loaf then place into the oven. Reduce heat to 375°F at this time and bake for about 30-35 minutes. The finished product should be dark brown and sound hollow when you tap the bottom of the pan. Remove loaf and brush melted butter over crust to prevent it from getting hard. (optional) Let cool completely.
Enjoy!


I decided to do this because I forgot to pick up rolls at the supermarket like I had planned to and I had no intention of going back to the store in the midst of the holiday craziness. Anyways, I loved the whole process, the mixing, kneading, waiting...... then the way it made my house smell! Divine! I was hooked. Hence, the reason why I finally got around to baking my own bread, I love the process. It is so simple, so easy, plus kneading dough is fun, although a KitchenAid stand mixer would be awesome! (wink)
So anyways, lets get down to business. Since I'm a novice at this, I decided on a basic recipe I found on one of my favorite sites allrecipes.com. I also wanted a little more help so I went to thekitchn.com. I finally decided on using the recipe from the latter, mainly because I did not have bread flour and my OCD would not allow me to use it, I also did not want all of three loaves and I did not feel like doing (putting it into a computer program) all that math. :) So, enough chatter, here's what I did.
All you need is flour, wheat flour, honey, vegetable oil (I just used the olive oil I had), milk, salt, warm water and of course yeast! Then you just need a large bowl, a clean kitchen towel, your hands, a loaf pan and some patience. Easy!
Ingredients
1 cup warm water (Approx 110°F or 43°C)
2 tsp Active Dry Yeast
1 cup milk
1/4 cup honey
2 tbsp vegetable oil
2 3/4 cups All Purpose Flour
2 3/4 cups Whole Wheat Flour
1 tbsp salt
2 tbsp melted butter (optional)
Directions
1. Pour water into the bowl and add yeast. Let sit until dissolved (remember do not kill the yeast with hot water) Stir in the milk, honey and oil.
2. Add the All Purpose Flour a little at a time and stir until ingredients are combined. Add the Whole Wheat a little at a time until your dough looks shaggy. Let this stand for 20 minutes to allow for proper absorption.
3. Turn dough over onto a floured surface and knead for about 10 minutes. If the dough is sticky, add a little flour. It should be smooth and slightly sticky and should spring back when poked when you are done. Shape into a ball.
4. Clean the bowl and film with a little oil then place your kneaded dough in it. Turn the dough to coat all sides. Cover the bowl and let sit in a warm area for about 1-1 1/2 hours to allow the dough to rise. It should look visibly puffed, almost twice the size it was before.
5. Sprinkle some flour on the counter and turn out your dough on top of it. Divide the dough in half and shape into a loose ball. Let sit for 10 minutes. (Since I only made one loaf, I wrapped one of the balls and placed it into a Ziploc then the freezer until I'm ready for it. You could do this after you shape it as well)
6. Grease the loaf pan. Shape dough ball into a loaf. You do this by flattening the ball into a circle, wait, shape into a rectangle slightly larger than the pan, wait, then roll into shape of log with seam on the bottom, tuck in the ends and pinch closed and invert into pan. You could also go here, Shaping a Loaf of Bread. Make sure the surface is stretched nice and taut.
7. Let rise once again until it is about to dome over the edge, about 30-40 minutes. Heat oven to 425°F halfway through.
8. With a serrated knife, slash the top of the loaf then place into the oven. Reduce heat to 375°F at this time and bake for about 30-35 minutes. The finished product should be dark brown and sound hollow when you tap the bottom of the pan. Remove loaf and brush melted butter over crust to prevent it from getting hard. (optional) Let cool completely.
Enjoy!

No comments:
Post a Comment